The fan came to us from the East. The first mention of it refers to China of the VIII-II centuries BC. It appeared in Europe at the beginning of the 17th century thanks to the Jesuits and merchants who collaborated with China. And he gained unprecedented popularity and significance at the courts of European emperors. It got to the point that during the Baroque and Rococo period, the fan was part of the ceremonial activities and communication between aristocrats. For example, the ladies could open the fan only in the presence of the queen. As for communication between people, if a woman touched her lips and heart with an open fan, then she told her chosen one that he was her ideal. If you wanted to show the suitor that he did not fit at all, then the fan was applied with the right hand to the left cheek. We invite you to plunge into this world and learn how to make a fan with your own hands.
paper version
There are several options here. The first one that comes to mind is a method from childhood. Namely, we take any paper, fold an accordion out of it, tie it at the base, open it, and now the fan is ready. However, if you want a more convenient and reliable design, then you can make this option out of paper and ice cream sticks:
To do this, simply glue the sticks in the fold line, and make a hole at its other end and tie a thread. Make such a fan can be used as fun for children.
However, we offer you a slightly more interesting option. Namely, a fan of paper tubes. For it we need:
- cardboard;
- newspapers or office paper;
- PVA glue;
- stationery knife;
- pen or pencil;
- acrylic paints;
- ruler;
- ribbons, beads and decor at your discretion.
Cut out two bases from cardboard. To do this, draw semicircles, as shown in the images below. If you have a compass, it will speed up your work.


Now, with the help of a clerical knife, we cut out our details.

Let's put the basics aside for now. We cut strips of about 6-7 cm wide from a newspaper or paper. We take a knitting needle and, starting from the corner, twist the tube. At the end, fix with glue. It is better to prepare more tubes in advance.


We glue an odd number of tubes onto one base, as shown below.

Cover with the other half of the base. We cut off the ends of the tubes that stick out from above.

We also close all sides with tubes with glue.


We take a new tube, fold it in half and bend around the first rack of the fan, thus weaving to the base of the fan.


When everything is ready, paint the entire fan with acrylic paint.

We decorate according to the idea, as in the photo below.

You can paint the fan with stain and then, looking at it, people will get the feeling that it is made of twigs.

knitted fan
For those craftswomen who know the skills of crocheting or knitting, we offer diagrams describing how you can create a fan using your skills.
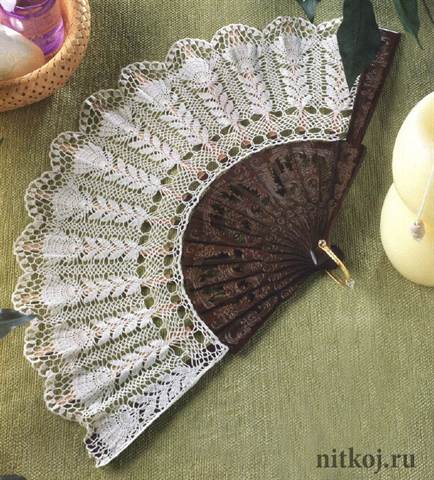

Such fans can suit you not only on a weekday, but also, for example, for a masquerade ball. You just need to choose a different thread color and use the decor.


Moreover, according to these schemes, you can tie a fan not only with a crochet, but also with knitting needles.
From wooden skewers
This accessory can perform not only the function of complementing the outfit, but also, for example, as a room decor. We offer you a master class on creating just such a fan. Prepare skewers, jute rope, glue and scissors.
Take 10 skewers and put them on the work surface. The extreme ones should be single, but in the middle of the sticks we add them in pairs, and we also fasten them.

Using a jute thread, we twist circles of different diameters in a spiral, fasten with glue. And put them between the skewers.


When all the segments are ready, then with the help of glue and the same jute thread we fasten them together.

We also start the thread on top. At the base we glue several jute spirals.

Such a fan will decorate the interior in eco-style, Provence, etc.
Other options and materials
It is also very popular to create fans from non-standard materials. For example, from disposable forks or spoons, as in the video below.
Coming from the depths of centuries, they are quite modern! Folding, solid, paper, fabric, wooden, feather, knitted - ordinary and original - fans have been and remain a relevant and sought-after women's accessory! In this article you will find three workshops on creating fans with your own hands.
paper fan
The fan is the most common paper craft. Making a paper fan is quite simple, but there are some subtleties.

Fold an ordinary sheet of A4 double-sided colored paper in half along the transverse line. Open the sheet, bend each edge to the center line. Open again - there have been three folds.

Bend the edge closest to you to the first marked line - another fold has formed. Expand, bend the same edge to the far (upper) intended line. This is the next fold. Do all these actions with the opposite edge of the sheet.

Open the workpiece, turn it over with the folds up. Bend the edge of the sheet closest to you to the first convex fold.

Grab the first convex fold and bend to the second. Continue to fold the paper like an accordion, grabbing each convex fold and folding it to the next. Bend the last convex fold to the edge of the sheet.

Now fold the resulting accordion in half, before bending one free edge. Bend the harmonica so that the bent edge is inside the bent harmonica (does not go around it from above). Bend the corners of the bent edge - bend the upper corners together down, the lower ones up.

Bend the bent edge with the wrapped corners into the middle of the accordion. Expand the fan and hide the part with bent corners inward. Press the folds well with your fingers. To uncover. Do-it-yourself paper fan is ready!


"Fork" fan
A fan of forks with your own hands is a completely unusual solution!

You will need:
- Odd number of disposable plastic forks (23-25 pieces).
- Self-adhesive foam board. Can be replaced with normal.
- A piece of satin fabric in your favorite color.
- Elegant lace with a scalloped edge 4 cm wide.
- Wide transparent lace for decorating the base.
- A compass (if there is no compass in the house, an ordinary faceted glass and a CD will serve as a substitute), a simple pencil and scissors.
- Transparent strong glue (“Moment Crystal”) or glue gun.
- Satin roses of different sizes and rhinestones - for decoration.
- Two or three satin ribbons of different colors from 1.5 to 3 cm wide (optional).

Fan base
Draw a circle with a radius of 6 cm on self-adhesive foam board with a compass, or outline a CD. Cut out the circle and cut in half.

Remove the backing protecting the adhesive side. Lay each half with the adhesive side on a piece of satin, press, smooth, gluing the fabric well. Trim the fabric along the edge of the cardboard. Lightly melt the edges with a lighter.

Lay wide transparent lace, gluing, over the satin with scallops down, releasing them beyond the straight edge of the semicircle. Turn the vertical edges of the lace inside out, glue.

Draw a circle of smaller diameter on the cardboard - with a radius of 3.5 cm, or outline the top of the glass. Cut out and cut in half.

Turn the large semicircle with the wrong side towards you and stick a small semicircle on it, aligning the centers of the semicircles. The small semicircle will act as a limiter.

frame
Glue the forks to the base with the teeth up - one by one. The rods of the forks should rest against the border of the small semicircle. The tines of the forks must be in contact - the sides of the tines can be immediately glued together.


Advice! The stems of the forks can be completely wrapped with a satin ribbon, gluing it along the way, and melting the ends.

Glue the second cardboard semicircle face up, covering the structure.

Decor
Gently thread a colored ribbon 1.1-3 cm wide between the rods of the forks. It is better to start from the bottom, melting the end and grabbing it with glue. At the end, glue the edge of the tape. In the course of the tape, also grab it with droplets of glue.

Then draw a second tape row between the rods. Let each row go in the opposite direction. There can be two or more rows - up to the beginning of the teeth.

Pass wide lace between the prongs of the forks, grabbing it with glue and directing it with scallops upwards. Melt the ends of the lace and glue. To make the frame of the fan more romantic, you can glue another, more airy, transparent lace, laying it in folds.


At the base of each fork, for charm, and to cover the laid folds, it is good to glue an artificial rose. You can stick rhinestones on ribbons and lace, and decorate the base of the fan with roses.

As you can see in the photo, this fan is quite beautiful. Such models can even be used in the wedding decoration of the premises.


Japanese fan
You will need:
- Paper with a patterned pattern, preferably with a Japanese theme - a sheet about 50-60 centimeters long. In principle, any paper will do, but a product made from special paper purchased at a craft store will look more professional.
- Glue "Moment Crystal" or glue gun.
- Scissors, tape.
- Two flat sticks (possible from Eskimo ice cream).

Step by step process
Carefully, slowly, fold a strip of patterned paper with a dense, uniform accordion in 1-1.5 cm increments. Wrap the lower part of the fan with tape. For reliability, it is better to make several turns. Glue flat sticks to the edges of the fan.

Important! The sticks should rest against the adhesive tape, in no case should they go on it, otherwise the fan will not be able to open.


Expand the finished product - the Japanese fan is ready with your own hands!

Having practiced on these simple models, you can move on to more complicated options - from fabric, feathers, according to the principle of a fan or wall masterpieces!


To protect against the summer heat or as a beautiful interior detail, sometimes you want to create a fan with your own hands. This is a very beautiful accessory. It has not lost its relevance for centuries. And despite the apparent complexity of the design, it is quite simple in execution.
Kinds
It is difficult to say when fans first appeared. They are known in different countries and cultures. A fan can be called any object that is designed to fan itself or others with wind currents.
In hot countries, slaves stood over their rulers and constantly waved huge long-handled structures over them. In medieval Europe, every young lady had a whole collection of hand fans of different colors and configurations. Some of them were even decorated with precious stones.
But most varieties appeared in Japan, where there was no shortage of paper - the basis for the fan. Here we know both beam constructions familiar to us, and products made entirely of paper on a handle, which, when unfolded, resemble a leaf of a tree, and when folded, they are completely hidden in a handle.
There is also a non-folding fan made of paper and other dense materials. It is also attached to the handle, to which the strap is attached, so that it is more convenient to carry it with you. Such a fan is decorated with paintings on scenes of everyday life, religion or landscapes of Japanese nature, which have features characteristic of this culture.
Fan from childhood
Consider the simplest master class. How to make a simple paper fan? Many of us did it as children. But in fact, it is not such a child's toy anymore. This is how it was made in China.
We take a rectangular sheet of paper. We divide its long side into equal parts, approximately 1-1.5 cm each. We fold the marked sheet with an accordion. At the same time, we make sure that each bend is clear and even.

When the workpiece is completely ready, we proceed to the creation of protective rails. They are made from thick cardboard. The length of the rail is equal to the length of the short side of the rectangle from which we make the fan, and the width is equal to the width of the fold. We glue the rails on both sides of the workpiece.
We fix the lower part of the fan in assembled form with a strip of paper or tape. So our simplest fan is ready. Now we will decorate it with our own hands in any available technique.
The main thing is that such a fan does not require much time to manufacture. At the same time, it does its job well and is quite compact when not needed.
Modeling a ray fan
Now let's see how to make a fan of a classic design, which we are used to seeing in movies, in pictures, and in everyday life.
It consists of three main elements: frame beams or knitting needles, a rivet that fixes them, and the canvas itself. As knitting needles, you can use wooden sticks or slats, plastic blanks. They are connected by a strong rivet, which leaves a little space for the slats to move freely.

The canvas of the fan is made of any dense material. For decorative purposes, paper or thin cardboard is more often used. For intended use, it is better to choose more durable materials: fabric, polyethylene, thin leather.
All parts are assembled together more often with glue, but they can also be sewn on if the knitting needles allow it. When the whole structure is assembled, proceed to its decoration. There is no longer a limit for the flight of fancy: painting, embroidery, feathers, lace, appliqués. The main thing is not to make this air accessory heavier.
Japanese fan
We all know that there is a special kind of fans - Japanese. They are not only very beautiful, but also have their own design feature.
In Japanese tradition, it is customary to create fans from a large number of knitting needles. At the same time, the shape remains the same - a semicircle. This results in the needles coming very close to each other, which creates an interesting decorative effect. Although, most likely, this design feature was introduced in connection with the use of this accessory as a weapon, where strength plays an important role.

The second distinguishing feature is the high artistic value. Making a fan with his own hands, the master puts his whole soul into it. This is clearly expressed in the picturesque paintings of traditional themes that adorn Japanese fans. Here we meet famous dragons, beloved cranes, and sakura flowers.
Today, Japanese fans are real works of art that are used as interior details.
Handmade product
If you want to know how to make a fan from ordinary plastic forks, we offer you an interesting way. For work, you will need disposable forks, cardboard, glue, decorative elements.
We cut out a semicircle from cardboard and glue it with a dense row of forks. We make sure that they form uniform beams, and all the heads lie with the teeth up. When the glue sets, we cover the workpiece with the same semicircle of cardboard and wait until the whole structure is completely glued together.

Now you can start decorating. Since the forks are a heterogeneous object, you can’t attach a classic canvas to them, but you can decorate them with lace, ribbons and bows. The main thing is not to be afraid to show imagination so that this master class will give you a truly unique decoration for a variety of purposes.
Blanks for decoration
If the main thing for you is not to create a full-fledged fan from scratch, but only to decorate it, then many shops are at your service. They offer blanks that require additional decoration.
Such fans are made of wood or plastic and covered with thick paper. This allows you to produce various paintings on blanks, thin applications, decoupage with napkins.
The same blanks will come in handy if you need knitting needles, but there is nowhere to get them. Just buy a similar fan and change its canvas to the one you need. This is also a great way to make a fan with your own hands.
When starting manual work, you must always remember that no one knows the original plan except you. Therefore, there is no reason to be upset if something does not work out. Let everyone think that this is your creative decision, and not a small oversight or failure!
The fan has been an indispensable thing for the beautiful half of humanity for several centuries. The fan has long been an indispensable accessory for many, and you can easily make it yourself!
This article is intended for persons over 18 years of age.
Are you over 18 already?
Do-it-yourself fan: application possibilities
How to make an original wall decoration is a question that interests many people. Wanting to stand out from the crowd and give their home individuality, people are looking for new ways to decorate. A good solution would be to create a fan on the wall. To make such an element of decor yourself, you need to be patient and have some materials and tools. The finished craft will be a worthy decoration for any room. It is also suitable for placement on the walls of a cafe. A master class on creating crafts can be viewed online.
Also, the fan will be a wonderful gift for mom for the New Year, birthday or March 8th. She will be able to decorate her house with them and always remember her daughter or son who presented such a gift.
For the frame, we need bamboo sticks. You can also take coffee sticks or ice cream sticks. In some cases, they are replaced with metal wires. First we make a paper base, and then we attach it to the frame. The final stage is the decoration of the craft. We design it based on our aesthetic taste.
Do-it-yourself fork fan: master class
Even preschool children can make a fan out of disposable forks. Although for this they need a little help from adults. Materials you need to have to create crafts:
- plastic forks;
- CD disc;
- cardboard;
- tapes;
- lace;
- scissors;
- glue.
We begin the creation of crafts with the manufacture of the frame. We will glue plastic forks on it. Cut the disk in half and decorate with colored paper. Next, you need to glue the plugs on half the disk. It is also possible to create a fan of spoons. The step by step instructions remain the same. When all the forks are glued, then you should move on to the decor. For decoration, we use satin ribbons: they need to wrap the forks beautifully. You can take ribbons of two colors. They definitely need to close the beginning of the cloves of the forks. A fan of plastic forks can be considered complete if lace is attached between the cloves. It must first be stitched, collecting folds on one side.
DIY paper fan
The paper fan is an easy task for kids of all ages that they can do for sure. Corrugated paper makes beautiful fans that you can not decorate. To create a large fan, you need to use whatman paper. He's going to harmonica. This step must be done carefully and carefully so that all edges are even.
If there is no drawing paper, then A3 or A4 sheets can be used. They must first be sealed with tape. For decorating a paper fan, self-made flowers from colored cardboard are suitable. You can also paint the fan with felt-tip pens. To get an openwork fan, you need to figuratively cut out the edges of the craft. For this, schemes for creating New Year's snowflakes are suitable. For decoration, you can take white lace or guipure.
A cardboard fan will turn out to be more durable than paper. The technique of creation does not change, but it is advisable to take sticks for the frame that are more durable. You can also make a fan out of a napkin at home. Having collected it with an accordion, it is necessary to apply glue very carefully. An excessive amount of glue will damage the structure of the napkin, and the craft will fail.
If there are playing cards that are not used, then you can make a fan of cards. Each card is folded into an accordion and fastened on both sides to wooden sticks. Then all the sticks are connected to each other. You can also make a fan out of newspaper tubes. It is not done very quickly, but the result will pleasantly surprise everyone.
Handmade fan made of fabric
If you need to make a fan for snowflakes, then you need to buy a light white fabric. It will become the basis of the future crafts. Having fastened a certain number of sticks from below, most often it is 20-24 pieces, it is necessary to attach the sticks to the fabric at an equal distance from each other. It will be easiest to sew them on one side. This will be the wrong side. Lace decor is suitable for the front side.
Also, extraordinary ideas for creating crafts include fans made by:
- from jute;
- from skewers;
- from rulers;
- from Chinese sticks;
- from tinsel;
- from money;
- from sweets.
The technology for creating crafts in each of the listed options is very similar. Therefore, if you don’t know what a fan can be made from at home, then we answer: from everything that comes to hand.

For special occasions, you can come up with a feather fan. The most beautiful will be a fan of ostrich feathers, but if they are not there, then you can replace them with goose feathers. They decorate the finished product. Feathers can be pre-dyed in your favorite color.
How to make a DIY fan for dancing
If you need to make a shawl for dancing, then it is recommended to pay attention to light and transparent fabrics. The shawl is worn on the arm on one side. It is in this part of the shawl that you can make decor. For oriental dances, a shawl embroidered with metal pendants that will ring when moving is suitable. You can also make it at home. When choosing a fabric for her, one must take into account the color and material of the entire outfit for oriental dances.
If you mount lithium batteries and a diode tape in a fan made by yourself, you will get a luminous LED fan. It will be a great party accessory.
DIY round paper fan
From the forks you get a fan that will decorate the wall or be a wonderful gift. If you need to make a costume for performing an oriental dance, then you can’t do without a veil fan. You can make a vale fan with your own hands in one evening, but before that you need to stock up on high-quality silk and a ready-made fan. The fabric should protrude beyond the dimensions of the fan by at least 50 cm. When stretching the silk between the ribs of the sticks, it should not be pulled too tight. After applying the adhesive, the product must be left for 24 hours to dry. If you perform the veil step by step, you will get a reliable craft that will flutter beautifully with the movements of the dancer for many years. If you attach a fan to your wrist, then the snowflake girl will be able to perform more complex movements.
The New Year's fan can be decorated with New Year's rain, carved snowflakes, sparkles, satin ribbons. When creating a fan for the New Year, it is worth considering the symbolism of the coming year. This year, it will be important to decorate the product with a painted muzzle of a dog. Also, a painted dog face will decorate a homemade postcard.
For the photo zone, it is worth making a large fan. A variety of elements are suitable for its decor.
For a fire show, bright fans are suitable that will not interfere with movement. It's not hard to make them yourself either. For the ball, the most chic fans made of fabric are suitable. The decor used is very different: semi-precious stones, feathers, lace.

DIY Japanese fan
Japanese-style fans are traditionally made from origami. This paper must be folded like an accordion, and a cord should be used as a holder. The Chinese fan is made using the same technology. You can also make a kitana fan for your child - the hero of a game that has long been loved by many. Uchiwa is a classic Japanese invention, made in the form of a petal.
The Korean fan has much in common with Chinese and Japanese fans. Its difference is in the stylization of the drawing. Koreans like to decorate the fan with the image of fruits, birds, flowers. For its decor, ivory and precious stones were used. Also, a special sign of the Korean fan is that it played the role of a weapon. Sharp blades were "mounted" in it.
In order to make a Spanish fan, you need to stock up on silk, velvet, lace, and feathers. All of these materials have traditionally been used in Spain to create jewelry. Often the drawings depicted scenes from the life of noble people.
How to make a big fan
If you need to make a large fan that will decorate the room, then it is better to choose light fabrics. A folding silk fan will remain in its original form for many years.
A self-made fan is a beautiful accessory not only for the home, but also for a stylish female look.